How to paint a box (DIY) – part I
The box is inherently a very simple and at the same time functional thing. Its applicability and versatility made it a popular solution for designers, hand-makers, shelving makers and decorators. A wooden crate is an interesting tool for creating racks, walls, shelves, display cases and even chandeliers. It performs many functional solutions.
But sometimes there is a need to paint the box in the desired color. There are a lot of questions – from the simple one – how to paint the box, to – which paint to choose for painting the crates, which paint will cover better, do I need to grind the box before painting? In this article we will try to give answers to some of the above questions.
We have 3 crates to paint, as we will try to show the differences in pre-treatment: 1. pre-treatment with a vibration grinder; 2. using manual grinding; 3. without preliminary grinding.
At first we take 2 small crates, size 40x30x15.

Boxes, grater, vibration grinding, paint and dyes
In this work, we will need natural wooden boxes, a hand grater for surfaces with sanding paper with a grain of 100 installed on it, an electric grinding machine with a vibration type sanding paper with round grit perforated paper with a grit of 100 (perforation is necessary to remove dust), water-based paint and dyes.

Natural wooden crate
The natural wooden crate without any processing

Шлифовка боковины ящика вручную

Grinding the bottom by hand

Sanding paper and grater are used to grind crate handles and sidewalls.

Grinding the cutouts for handles
Since our wooden box is with handles, we can grind them if necessary, using a regular sheet of sanding paper.
Manually grind the cutout.

Wooden boxes grinded by hand and using a grinder
After grinding the boxes in two ways, the difference in surface is almost imperceptible. Looking ahead, let you know that the difference will almost disappear after painting.

Boxes with and without grinding
Three crates with different processing methods – manual grinding (left), grinding using a vibratory grinder (right) and no grinding at all (lower)

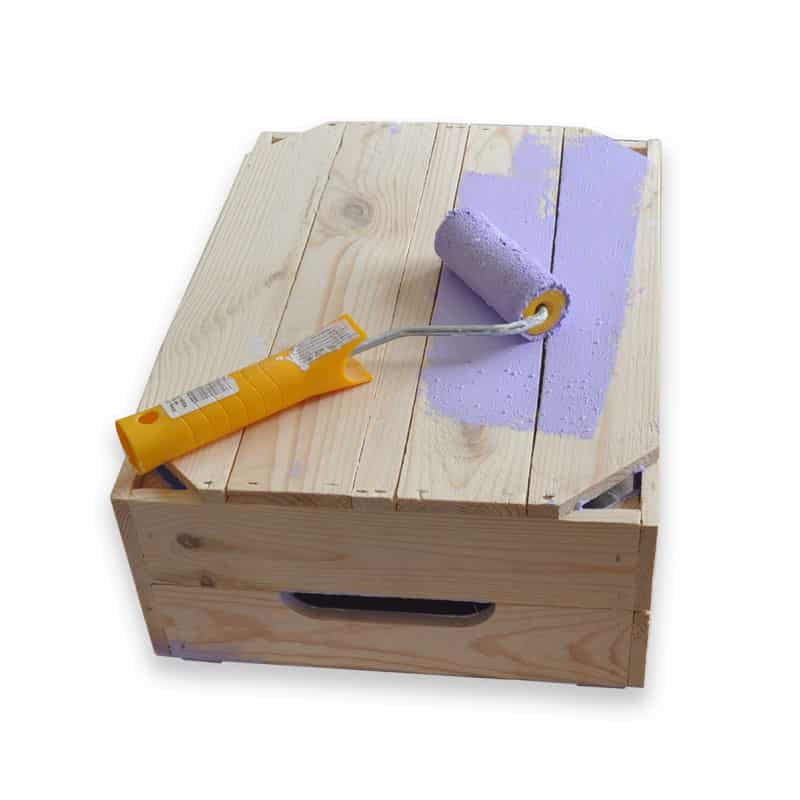
Crate painting tools
A container for paint, a brush, a roller, a trough for paint and, in fact, the wooden box itself.

Pour approximately 300 g of paint into the container and add the required amount of dye.

We achieve the desired color by gradually mixing white paint and dye.

Pour the paint into the trough for future use.

Paint hard-to-reach places
The brush is useful for painting such places in the box as the cutouts and the inner corners.

We paint the inner parts of the box with a roller …
… and outer parts

It’s more convenient the outer parts of the crate painted last, as you don’t have to turn it over anymore to stain the inside.

Leave the box to dry …
The drying time of the paint depends on the ambient temperature, humidity and the thickness of the paint layer. It usually takes several hours for the paint to completely dry. So, it took us about 100-120 g of paint to paint 1 box 40x30x15 cm. We save the remaining material for the next boxes.


to be continued …